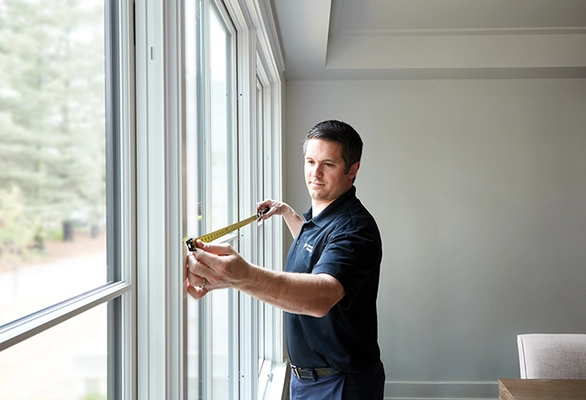
Undertaking a DIY project to replace windows and doors can be a rewarding challenge that not only saves you money but also gives you control over the improvement process. This 1000-word article provides a comprehensive guide on the essential tools, tips, and techniques needed for DIY window and door replacement, ensuring a successful project from start to finish.
Essential Tools for the Job
Having the right tools is crucial for a smooth DIY installation. Here’s what you’ll need:
- Tape Measure: Precision is key, so a reliable tape measure is indispensable.
- Level: Ensures your windows and doors are installed perfectly horizontal and vertical.
- Caulking Gun: Used for applying sealant around the window or door frame to ensure weather-tightness.
- Screwdrivers and Hammer: For basic fittings and fixtures.
- Power Drill and Bits: Necessary for making pilot holes and driving screws.
- Utility Knife: For trimming shims and cutting through old paint or caulk.
- Pry Bar and Putty Knife: For removing the old window or door and cleaning up the frame.
- Shims: Used to ensure the window or door is plumb and level in the frame.
- Foam Insulation: Spray foam for gaps to improve energy efficiency.
Preparing for Installation
Preparation is key to ensuring that the installation process goes smoothly and safely:
- Measure Accurately: Measure the existing frame or opening three times to ensure accuracy—measure the width and height at multiple points.
- Choose the Right Replacement: Select a window or door that fits the existing space or make necessary adjustments to the opening.
- Check the Frame: Ensure that the existing frame is sound and free of rot or structural damage. Repair or replace any compromised parts before proceeding.
Step-by-Step Installation Guide
Follow these steps to replace a window or door:
- Removal of the Old Unit:
- Carefully remove the existing window or door, starting with the trim and molding.
- Use the pry bar and putty knife to gently remove the unit to avoid damaging the surrounding wall.
- Prepare the Opening:
- Clean the opening thoroughly, removing all debris, old nails, and loose paint.
- Check for level and plumb. Adjust with shims if necessary.
- Dry Fit the New Unit:
- Before permanently installing, place the new window or door in the opening to check for fit.
- Make adjustments as needed, using shims to achieve a level, plumb, and square fit.
- Secure the Unit:
- Once properly aligned, secure the window or door by screwing it into the frame through the pre-drilled holes in the unit’s flange.
- Use the level again after securing to ensure no movement has occurred.
- Sealing and Insulating:
- Apply caulking around the outside of the frame to seal against weather.
- Use expanding foam insulation around the perimeter between the frame and wall for energy efficiency, being careful not to overfill as this can bow the frame.
- Finishing Touches:
- Replace or install new trim and molding.
- Apply paint or sealant as needed to protect the material and improve aesthetics.
Tips for a Successful Project
- Don’t Rush: Take your time with measurements, cutting, and installation to ensure the best fit and finish.
- Seek Help When Needed: Some steps may require an extra set of hands—don’t hesitate to ask for help to ensure safety and accuracy.
- Watch and Learn: There are numerous video tutorials available online that can provide visual guidance and tips specific to the type of window or door you are installing.
Conclusion
DIY window and door replacement can be a fulfilling project that not only improves your home’s appearance and efficiency but also provides a sense of achievement. By following the detailed steps and tips provided, even a novice DIYer can successfully complete this project. Remember, careful preparation, patience, and attention to detail are your best tools in achieving a professional-quality installation.


