Between backyard barbecues, surprise downpours, and the steady shuffle of daily life, your outdoor surfaces endure quite a bit of action.
Over time, those marks and blotches creep in, dulling what was once a tidy walkway. Ignore them for too long, and they’ll burrow deep enough to demand real elbow work later on.
Fortunately, you don’t need boutique products or a weekend lost to scrubbing marathons. With a few smart steps, you can lift most stains and get your path looking sharp again.
Identify the Stain Type
Before you reach for the mop and bucket, take a moment to figure out exactly what you’re cleaning. Get this sorted early, and you’ll spare yourself the whole “cleaning soundtrack of sighs” moment.
- Oil stains. They usually show up as dark, greasy patches, most often near the driveway or garage. If a paper towel picks up any residue when you blot the area, that’s your confirmation.
- Rust. It appears as reddish-brown streaks or rings, often caused by metal furniture, tools, or fixtures left out during wet weather. You’ll typically find it around the legs of outdoor chairs or where water tends to pool.
- Mould and mildew. They thrive in damp, shaded spots, creeping in as green or black smudges. Left alone, they can turn your path into a bit of a slip hazard, especially after rain.
Here’s a quick, reliable way to double-check what you’re dealing with. Sprinkle a small amount of baking soda over the stain and add just enough water to form a paste.
Let it sit for two or three minutes. If the paste darkens or looks greasy, you’re dealing with an oil stain. If it stays the same, you’re likely dealing with something water-based, like rust, mould, or general grime.
Choose the Right Cleaning Solution
Here’s where things get satisfying—and you don’t need a cupboard full of pricey products to get results.
For oil stains, a splash of dish soap mixed with warm water does wonders. Let it sit for a few minutes to break down the grease, then scrub and rinse.
Rust, on the other hand, needs something a little punchier. Cleaners with oxalic acid work well here. A short soak and a gentle scrub should take care of those reddish streaks that seem to appear out of nowhere.
If mould or mildew has taken hold, a mild bleach solution usually does the trick. Mix one part bleach with ten parts water, let it rest briefly on the surface, then rinse thoroughly to keep things safe and spotless.
Those who prefer the eco-friendly route aren’t short on options either. Cleaners from local brands like Koala Eco and Earth Choice cut through dirt without upsetting the environment.
And if you’re in the mood for a DIY fix, white vinegar is brilliant for lighter marks. Let it sit for a few minutes, then scrub gently and rinse for a fresh, clean surface.
For the truly stubborn spots, whip up a paste of sodium bicarbonate and water. It’s gentle enough to protect your surface but strong enough to tackle dirt that’s overstayed its welcome. Plus, these homemade solutions are safe if you have little ones or pets running around.
Prepare the Area
Before you start scrubbing away, give the space a quick once-over. A few minutes of prep will save you plenty of cleanup later.
Sweep off leaves, dirt, and the odd bit of clutter that somehow ends up along the path. It’s amazing what collects there after a week of windy weather.
Plants don’t do well with harsh cleaners, so cover them with plastic sheets or an old tarp. It keeps them safe from any runoff or splashes that could affect their pH balance.
Before you move on, lay down a few cloths or rags around the area to catch overspray, then give the surface a quick rinse with your garden hose.
That light wash knocks down dust and helps your cleaner soak in properly instead of sitting on top doing nothing.
Apply the Cleaning Solution
Now, it’s time to let your cleaner do its thing. Whether you’ve mixed up a vinegar blend, dish soap, bleach, or even picked up a store-bought formula, make sure it’s ready before you begin.
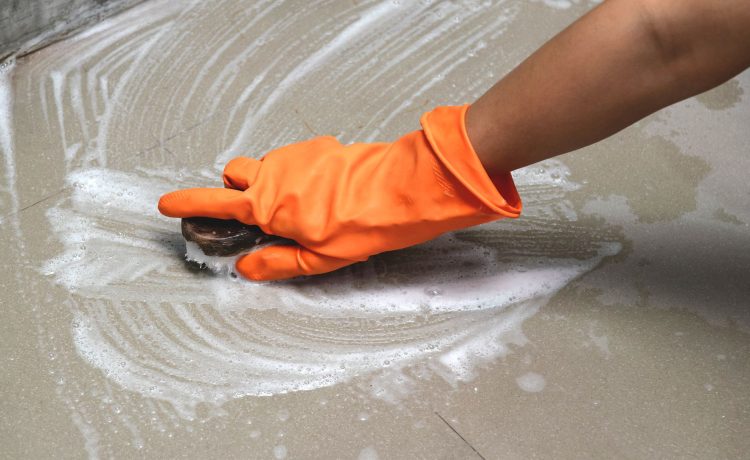
Pour or spray it evenly over the stain, giving stubborn spots a little extra attention. A soft-bristled brush is quite great at working the solution into those tiny surface pores, without damaging the concrete.
Don’t rush it. Let the cleaner do its job for a few minutes. In no time, the marks will be gone, leaving you looking like a cleaning pro without breaking a sweat.
And don’t skip the gloves. Even mild cleaners can be harsh on your skin, and there’s no point scrubbing your path spotless if you end up with sore hands for your trouble.
Use Pressure Washing for Tough Stains
When scrubbing fails, it’s time to bring in a pressure washer. This powerhouse uses a water jet that can blast away the most stubborn grime in seconds.
Start by pre-treating the area with your cleaner to loosen dirt. Then, use a 25-degree nozzle and keep the spray about 12 inches from the surface.
This is close enough to clean, but not so close that you damage the concrete. Work at a 45-degree angle for maximum force and minimal splashback.
Remember that safety comes first, so wear gloves and eye protection to shield yourself from debris and chemical splashes.
Done right, pressure washing can make a walkway look brand new, especially when tackling greasy, oil-soaked spots that no amount of scrubbing could fix.
Rinse and Dry the Area
Once you’ve tackled the grime, rinse everything down thoroughly. Leftover cleaner can eat away at your concrete over time, so grab your hose and flush every corner.
Let the surface dry completely before walking on it—sunshine and a light breeze usually do the trick. On humid days, you can set up a fan to help things along.
However, if scrubbing concrete isn’t your idea of fun, you can hire a house maid service. They’ll handle the hard work for you, leaving your path gleaming while you stay comfortably clean.
Prevent Future Stains
It’s easier to protect your paths than to keep rescuing them. Apply a concrete sealer once a year to form a shield against spills and weather damage.
Place mats or trays under planters, grills, and outdoor furniture. They’ll catch drips before they turn into lasting stains. And when accidents happen, act fast. A quick wipe beats hours of scrubbing later.
Give your walkways a regular once-over, too. Catching early signs of discolouration or buildup keeps everything looking clean and cared for all year round.
Conclusion
Congratulations! Your concrete paths are now looking sharp and stain-free! With a little elbow grease, smart cleaners, and maybe a pressure washer for the tough spots, you’ve tackled what could have been a messy, frustrating job.
Keep up the occasional quick check, deal with spills as they happen, and your walkways will look wonderful—no superhero powers required.