
Dealing with a leaky toilet base might seem like a minor hassle, but it can quickly turn into a major headache if left unchecked. The slow drip of water may appear insignificant, yet over time, it has the potential to cause extensive water damage to your bathroom floor and even lead to the growth of mold and mildew. Addressing this issue promptly is vital to prevent these more serious consequences and to ensure the longevity of your bathroom infrastructure.
Assessing the Situation
Identifying the Source of the Leak
Pinpointing the origin of the leak is essential in resolving the issue. Leaks around the toilet base can stem from various factors, such as the deterioration of the wax ring, loose bolts, or even a cracked toilet base. A degraded wax ring might not create a proper seal between the toilet and the flange, allowing water to seep out. Loose bolts can lead to a wobbly toilet that lets water escape. A cracked toilet base, albeit less common, can also result in leaks. Understanding these potential causes sets the stage for an effective repair.
Gathering Necessary Tools
Equipping yourself with the right tools ensures a smooth repair process. You’ll need a few essentials: a wrench for securely tightening bolts, a replacement wax ring to establish a proper seal, towels to keep the work area dry, a caulk gun for precise application, and caulk to seal any gaps once the repair is complete. These tools are your allies in tackling the leaky toilet base.
7 Steps in Repairing the Leaky Toilet Base
STEP 1: Turn Off the Water Supply
To begin, carefully locate the water shut-off valve usually positioned behind or near the toilet. Gently turn the valve clockwise until it’s fully closed to halt the water supply to the toilet. This essential step prevents any potential mess during the repair process.
STEP 2: Drain the Toilet and Remove Water
Flush the toilet to drain as much water as possible from the tank and bowl. Then, using absorbent towels, mop up any remaining water in the bowl and tank. This ensures a dry work area and makes the next steps more manageable.
STEP 3: Loosen and Remove the Toilet
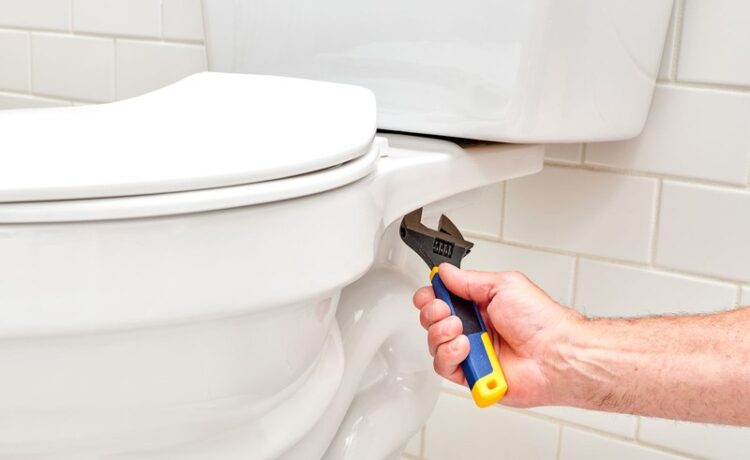
Using an adjustable wrench, disconnect the water supply line from the toilet tank. Afterward, locate and unfasten the bolts securing the toilet to the floor. Carefully lift the toilet and set it aside. This step demands patience to avoid any undue strain on the surrounding plumbing.
STEP 4: Inspect and Replace the Wax Ring
Examine the wax ring positioned on the flange to identify signs of wear or damage. Gently remove the old wax ring and properly clean the flange surface. Subsequently, position the new wax ring onto the flange, ensuring it’s centered and ready for reinstallation.
STEP 5: Reinstall the Toilet
Lower the toilet over the wax ring, aligning the bolt holes with the floor bolts. Gently press down to compress the wax ring and create a secure seal. Begin tightening the nuts onto the bolts, alternating between sides to ensure even pressure until snug.
STEP 6: Apply Caulk for a Secure Seal
Using a caulk gun, apply a steady bead of caulk around the base of the toilet where it meets the floor. This not only provides a clean finish but also enhances the water-resistant seal, preventing leaks and further damage.
STEP 7: Turn On Water Supply and Test
Reconnect the water supply line to the toilet tank, and slowly turn on the shut-off valve. Allow the tank to refill. After the tank has filled, flush the toilet and closely observe for any signs of leaks around the base. If no leaks are detected, your repair is successful.
Preventive Measures
Regular Maintenance
When it comes to maintaining your toilet, a proactive approach can save you from future headaches. Make it a habit to periodically check for loose bolts and any signs of wear around the toilet base. Tightening loose bolts ensures the stability of the toilet and prevents it from shifting over time. Detecting signs of wear early on allows you to address potential issues before they escalate into costly repairs. Regular maintenance not only keeps your toilet in good condition but also contributes to the overall longevity of your bathroom fixtures.
Addressing Issues Promptly
Leaky toilets might seem like minor nuisances, but ignoring them can lead to more significant problems down the line. Tackling leaks promptly is essential to prevent further damage to your bathroom flooring and subfloor. Even a small leak can gradually weaken the structural integrity of the area around the toilet base. By taking swift action to fix leaks, you not only save money on potential repairs but also maintain a clean and safe bathroom environment for years to come.
Using Quality Materials
When it comes to fixing a leaky toilet base, the choice of materials matters greatly. Opt for durable wax rings and high-quality sealing materials. Investing in these components ensures a reliable and long-lasting seal between the toilet and the floor. A well-sealed toilet base not only prevents leaks but also minimizes the risk of water seeping into the subfloor, which can lead to more extensive damage over time. By using top-notch materials, you set the foundation for a leak-free and worry-free bathroom experience.
In the journey of fixing a leaky toilet base, swift action and careful attention can make all the difference. By following the seven essential steps and adopting preventive measures, you not only rescue your bathroom from potential damage but also ensure its reliability for years to come.
Publisher’s Details:
Plumbing Squad
2412 Gundry Ave, Signal Hill, CA 90755
(866) 324-9553
plumbingsquad.com
info@plumbingsquad.com
In the process of fixing a leaky toilet base, it’s crucial to consider preventive measures for your plumbing system’s overall health. To avoid further issues like burst pipes, explore Plumbing Squad’s insightful blog post on “How to Prevent Burst Pipes.” For premier plumbing services in Long Beach, CA, Plumbing Squad offers the best solutions to keep your plumbing in top shape.
<iframe src=”https://www.google.com/maps/embed?pb=!1m18!1m12!1m3!1d3315.4270130896443!2d-118.1739889!3d33.801291899999995!2m3!1f0!2f0!3f0!3m2!1i1024!2i768!4f13.1!3m3!1m2!1s0x80dd33f7aba2eb63%3A0x196ac426d46b909f!2sPlumbing%20Squad!5e0!3m2!1sen!2sph!4v1692190277596!5m2!1sen!2sph” width=”600″ height=”450″ style=”border:0;” allowfullscreen=”” loading=”lazy” referrerpolicy=”no-referrer-when-downgrade”></iframe>


